
In my last Production class homework post I created a video of my MacBook’s display as I manipulated GarageBand. Here’s how I did it:
If you have Mac OS 10.6 (Snow Leopard) or above, the included QuickTime Player (version 10.0 (comes with Snow Leopard) or 10.1 ( comes with Lion) will do video capture. The Snow Leopard version captures your entire screen; the Lion version allows you to designate a portion of the screen to capture, as well as having more robust editing options.
Recording
Arrange your screen to display what you want to record (e.g., open the window of the application you are recording, close other applications that might interrupt your recording with pop-up windows, sounds, etc).
In QuickTime Player, choose File -> New Screen Recording
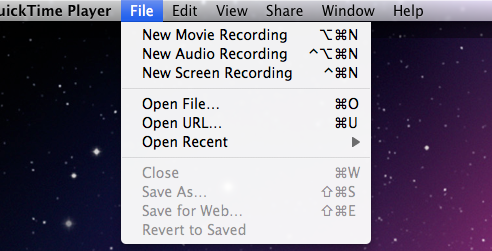
Click on the arrow to view a drop down menu where you can set up audio, quality, and file location.
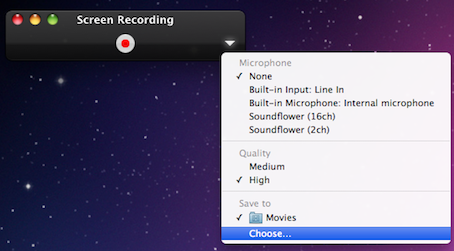
If you have a laptop with a built-in microphone you can use that. A Skype USB headset works well. Or you can do what I did (because I knew I’d need to add the audio from my GarageBand file afterward – QuickTime does NOT record music playing on your computer while you are recording): I recorded my voiceover narration with my iPhone (or any recording device that gives you an mp3 or other audio file).
When you’re ready to record the video, click on the red record button.
When you are finished, stop recording. When you click on Start Recording, a Stop Recording icon appears in your menu bar at the top right of your screen. Click on it when you’re finished recording.
Editing
If you need to do any serious editing (other than trimming the beginning or end of the video) you will need to import the video file into iMovie or another video editing app.
[Stop reading here if serious tech geeking annoys/frightens you! >;-0 ]
What I did:
– Imported the video into iMovie.
Imported the .wav audio file from my iPhone into Audacity (or another audio editing app).
– Made separate narration audio files – each went as far as the next spot in the video where I was playing back an audio music sample.
– I had also made separate audio files for those GarageBand music examples.
– Dropped each of the audio files into the video project in iMovie at the appropriate place (e.g., “intro narration”,” 1st GarageBand playback example”, “2nd narration”, “2nd GB example”, etc.).
– Lined up the audio with what was happening in the video (e.g., music example starts when Play button is clicked in video)
– Added beginning title and end fade-out.